Followers

Thursday, March 29, 2018

More Honey Bunnies

Hello everyone

It's Sue here today.

I have a tutorial for you, to show you how to create a masked Copic airbrush background and also how to colour some rather cute bunnies to go with them.

Here are the craft items I used -
a Copic Air System,
Copic Markers FBG2, BV04, V04,
Make It Colour Blending Card 
Three masks created with die cut shapes from heavy weight card,
a selection of Mama Elephants gorgeous Honey Bunny stamped images.
It is also really important to cover your desk otherwise everything will be airbrushed! 
I have discovered I can use my MISTI as a base for securing images for airbrushing!
I cover the MISTI magnetic base with paper and place the card and the mask (or stencil) on the paper and fix it down with the MISTI Magnets!  The MISTI stays clean because it is covered in paper and I have a spare set of magnets I only use for airbrushing!

I covered the white card with the square mask and fixed it down.  Then I then started airbrushing in FBG2, slowly and steadily to cover the card.
I repeated this until I had a depth of colour I was happy with.
I repeated this again with the heart and circular shaped masks.  (I then die cut them to use as card backgrounds later).
I decided it would be nice to create a pattern on one of the airbrushed backgrounds with a stamp

When creating a background stamped with Colourless Blender It is important to work quickly as the Colourless Blender will evaporate quite rapidly.
It's a good idea to get everything ready before you put the blender in the pot!
I used a super size dauber by Tsuksienko  to apply the blender to the stamp, it holds quite a lot of blender and I was able to cover the stamp quickly.
Then I stamped the background onto my airbrushed design.  The secret here is to make sure you haven't used too much blender and you don't press down too hard.  A light touch will be all you need to apply the blender to the design.
Your design will now look something like this - I absolutely love it when I see the design the Colourless Blender has created - Colourless Blender really is one of my favourite Copic products!
I love this background stamp so much I think I might use it on everything! (:

Next, I assembled the colours I needed to colour the bunnies.
W00, W1, W2, W4, W6 & C00, C1, C3, C5 
I started to colour the areas where I want the darkest part of my image to be with a W2.  This primes the card and makes it easier to blend the darker colours; it basically creates a base for the pigments in the alcohol solution to move about on.  
I then colour with W6 where I want the darkest part of my image to be.
Then I used W4 to blend out the W6 
...and then W2 to blend out the W4 towards the light.
...and the same with W1

(I then repeat all these steps to create a good definition between the darkest and lightest parts of my image)

Finally I colour with my lightest marker W00 where I want the lightest part of my image to be.
Finally I added a cast shadow under the bunny's chin with W8
Here are the cards I created with the Copic backgrounds and bunnies!
I had such fun doing this!  It would be great if you could try this too and show us your cards at
Copic Marker Europe on Facebook.
To find us just follow the link
HERE.


Thank you for popping by.
Happy Copic colouring

from Sue...xxx

Wednesday, March 28, 2018

Mermaids

Hi there Copic loversElena F here from Scrap-lanak Ganbaran.

I made some bookmarks using the No Lines Colouring Technique. I stamped with different colours of Memento Ink to show you the different intensities between traditional black stamping and no lines colouring, but using the same Copic colour markers to colour them.


First, I stamped all the main characters from the stamp set. Each one in one different Memento ink as you can see in the picture. I also stamped each one on a post it note to make a mask so I can create a scene.


After some masking I decided to go with those scenes to colour.


I started colouring the skin with these markers; E0000, 00, 21, 11,13, E95.


I want the main characters to pop up in the design so I coloured their tails with FYG1, YG01 and adding a lot of mini dots in YG23 and G94.


I coloured the hair in red using R89, 59, 85, 83.


Now it's time to play with the background. I started colouring with BG10 and BG000 on all the the tags.


I painted a lot of seaweed branches starting from my lightest green colour to the darker one using YG61, 63 and G94. In the next picture showing you can see how different the backgrounds look just by adding some seaweed.


Sand colouring using the following markers: E57, 35, 21, 53, 00.


I left the little details and fishes till the end to see which colour would be the prettiest and pop up them up, after all the background was coloured.


To finish my colouring I took some Multiliners to add details to the eyes, the fish, and some lines in the seaweed. See how different they look? There is much more depth:


....and colouring done.

The list of markers I've used to colour the tags:

Skin: E0000, 00, 21, 11, 13, E95
Hair: R89, 59, 85, 83 
Tails: FYG1, YG01, YG23, G94
Greens: G94, YG61, 63
Background: BG000, 10
Sand: E57, 35, 21, 53, 00

I hope you found this post inspiring.
Thanks for sticking with me to the end!


Monday, March 26, 2018

ticketalbum

Hello everyone.

I have made a gorgeous little project with some cute stamps by Paperartsy. The backgrounds are coloured with Derwent Inktense Paint Pans, all the images are coloured with Copic Markers. 

I love the combination of watercolours and Copic Markers. Watercolours are wonderful for their transparancy while Copic are so full of colour. The combination of of the two together is just perfect.

I've cut out all the pages first and stamped the images using Memento black ink.
In the next step I coloured all the backgrounds, using the Inktense paint pans. 

And then I started colouring all the images.

I will show you a few detailed photographs of how I colour my images. In the end I will show you all the pages in my little book.


I start with the Y08. Add a thin layer.
I also noticed that I forgot to colour a few pieces of the background, but that is ok, I can always add some colour later. 


For the seconnd layer I use a warm yellow, the Y17.


Blend the layers together with the Y15. 


Blend all layers together using the Y08 again. 


For all the little doodles on the flowers I have used a variety of colours.
I start with R59.


Add some pink, RV06, 09.


And some blue and purples, B24, FV2 and BV08.

In the next few photographs I will show all the pages:


petals YR15, YR16 and YR07
flower heart Y17 and YR04
doodles RV06 and RV09


doodled border:
YR15, YR16, YR07
RV04, RV06, RV09
R35, R37, R59


orange bird: YR15, YR16, YR07
wings and eyes:YG03,  YG17 and YG67
 dress: RV04,  RV06 
yellow bird; Y08, Y17


tree: Y06, YG03, YG17, YG67, E27, E29
blue bird: B14, B16, B19, RV06, RV09
yellow bird: Y08, Y15, Y17, RV06, YR15, YR18


tree: Y06, YG03, YG17, YG67, E27, E29


flower heart: YR14, YR15, R59
green leafs: YG03, YG17, YG67


orange toadstool: YR14, YR15, YR07
doodles on the toadstool: RV06, RV09, B24 B14, FV2, BV08
pink toadstool: RV04, RV06, RV09
doodles toadstool: B24, B14, YR14, YR15, FV2, BV08
yellow flower: Y13, Y15, Y17


blue toadstools: B21, B23, B24
doodles toadstools: YR14, YR15, FV2, BV08, RV06
berrybush: FV2, BV08, YG03, YG17, YG67


RV04, RV06 and RV09


YG03. YG17 and YG67


flowers: Y08, Y15, Y17 
doodles: FV2, BV08, RV06, RV09, R59, B24


blue flowers: YG03, YG17, YG67, B12, B14, B16
yellow flowers: Y08, Y15, Y17, Rv04, RV06, RV09

This is the last page in my little book. I really enjoyed working on this project. 

Have a wonderful day.

Miranda

Thursday, March 22, 2018

Cicci Colour a Tree

Hi Everyone!
Today I, Cicci, am going to colour a tree and show how I do that.
I have not used any image this time, instead I drew it by myself.
I'm only going to show a section of the tree in this tutorial 
but  I do the same steps all over.


The Copic Markers I have Used are:
Tree: E53 57 59 49 11 Y21
Books: Blue: B39 37 34 B000 Y26 28 Y02
Red: R14 24 35 39 89 E49
Green: YG03 BG99  97 95 93 YG23 
Brown: E43 40 E53 51 Y21 Y02 26 28
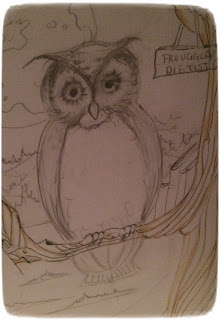
Owl: E53 31 43 40 41 RV000 Y21 E25 23 29
White Posca pen for white details
and Aqvarell pen light and dark
Grass:
Sky: B99 39 95 93  34 32 B00 B000 BG0000
Moon: C0 2 B000 BV000
Ground and Forest: B0000 00 C0 1 BG0000


Step 1 
Draw a tree or use a digital image 
Just fill the drawings lines with E53 

Step 1
'

Step 2 
Add E57 in the same area you have coloured with E53

Step 2

Step 3
Add E29 at the bottom of the tree, that's the area that I'm going to make darker
because it's further away from the light source (Moon) 


Step 4 
Blend With E11


Step 5 
Add E25. Blend with E23 on the lines


Step 6
Blend with E11


 Step 7
Add E29 on the parts that are furthest away
 from the moon and blend with E23

Step 8
Blend  Y21 everywhere

Step 9
I'm going to use E49 as my darkest marker 
Add E49 carefully because at this point in the colouring I already have done lots of
layers and I don't want the ink to go sticky 


Step 10 
Add a little more E59 - carefully as you did with E49


Step 11
Blend with E23 and Y21 


Thank you for your Visit and hope to see you here again soon !!
Have a lovely day

Hugs and Smiles
 from us at Copic Marker Europe